Introduction
Cooking a turkey breast to perfection without drying it out can feel like an intimidating culinary challenge. With its naturally lean meat, turkey breast tends to dry out quickly if not prepared and cooked with care. Whether you’re planning a holiday feast or simply want to try something special for dinner, learning the proper techniques can make all the difference. This article will walk you through everything you need to know, from preparation and cooking methods to serving and storing tips, ensuring your turkey breast remains tender, juicy, and full of flavor.
Part 1: Understanding the Challenge
Why Does Turkey Breast Dry Out?
Turkey breast often dries out because of its low fat content compared to other cuts of poultry. Unlike dark meat, which retains more moisture, white meat cooks faster and requires precise handling. Overcooking is another common culprit—when the internal temperature exceeds the recommended level, the proteins tighten and squeeze out moisture.
Furthermore, turkey breast is frequently cooked without its skin, which plays a vital role in retaining juices during roasting or grilling. All these factors combined make cooking a moist turkey breast seem tricky, but with the right approach, it’s achievable.
Selecting the Right Turkey Breast
Choosing the right turkey breast is the foundation of a successful dish. Opting for a bone-in, skin-on turkey breast can provide a natural shield against moisture loss during cooking.
- Bone-in vs. Boneless: Bone-in turkey breasts are less likely to dry out as the bone helps distribute heat evenly.
- Fresh vs. Frozen: Fresh turkey breasts tend to retain more moisture, but frozen ones work well too—just ensure they’re thawed properly before cooking.
- Skin-on vs. Skinless: The skin acts as an insulation layer, keeping the breast moist. If possible, always go for skin-on varieties.
Understanding Cooking Times
To avoid overcooking, precise timing is crucial. Generally, turkey breast needs about 20 minutes per pound at 350°F (175°C) in an oven. However, the best practice is to use a meat thermometer to monitor the internal temperature, aiming for 165°F (74°C) at the thickest part of the breast.
Part 2: Preparation Techniques
Brining: Enhancing Moisture and Flavor
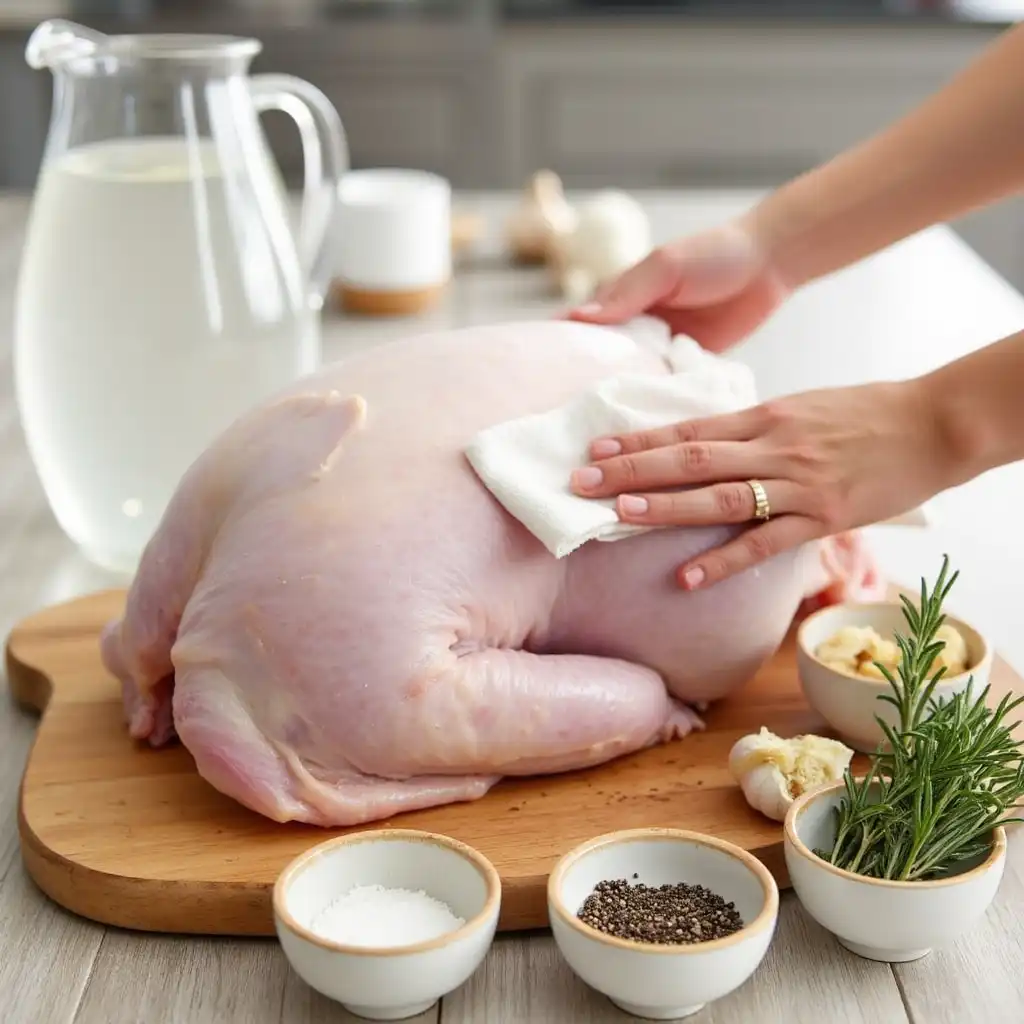
Brining is one of the most effective ways to ensure your turkey breast stays moist and flavorful. It involves soaking the meat in a solution of salt and water, which helps it retain moisture during cooking. The magic of brining lies in osmosis, drawing in water and seasoning into the turkey breast’s fibers. This process creates a juicy and tender bite every time.
Wet Brining Steps:
- Combine 1 gallon of water, 1/2 cup of kosher salt, and optional seasonings like bay leaves, garlic cloves, and peppercorns in a large pot.
- Stir until the salt dissolves completely.
- Submerge the turkey breast in the brine, ensuring it’s fully covered.
- Refrigerate for 6-12 hours. Avoid over-brining, as it can make the meat too salty.
- Rinse the turkey breast under cold water and pat it dry before cooking.
Dry Brining Alternative:
If wet brining isn’t practical, a dry brine is a fantastic alternative. Rub a mixture of kosher salt and your favorite spices directly onto the turkey breast. Cover and let it rest in the refrigerator for 12-24 hours. This method enhances the flavor without requiring extra liquid.
Marinating: Infusing Flavors
While brining focuses on moisture, marinating is all about building bold, infused flavors. A good marinade typically combines fat (oil or butter), acid (lemon juice or vinegar), and seasonings.
Turkey Breast Marinade Recipe:
- 1/3 cup olive oil
- Juice of 1 lemon
- 3 cloves of minced garlic
- 1 tablespoon dried thyme
- 1 teaspoon paprika
- 1 teaspoon black pepper
How to Marinate:
- Mix all ingredients in a bowl.
- Place the turkey breast in a resealable plastic bag or shallow dish.
- Pour the marinade over the meat, ensuring it’s well-coated.
- Seal and refrigerate for 2-4 hours. Avoid marinating for too long, as the acid can break down the meat’s proteins excessively.
Applying a Butter or Oil Rub

Another secret weapon for a moist turkey breast is using a rich butter or oil rub. Butter, infused with herbs and spices, not only adds flavor but also helps the skin crisp up beautifully while sealing in the juices.
Steps to Apply a Butter Rub:
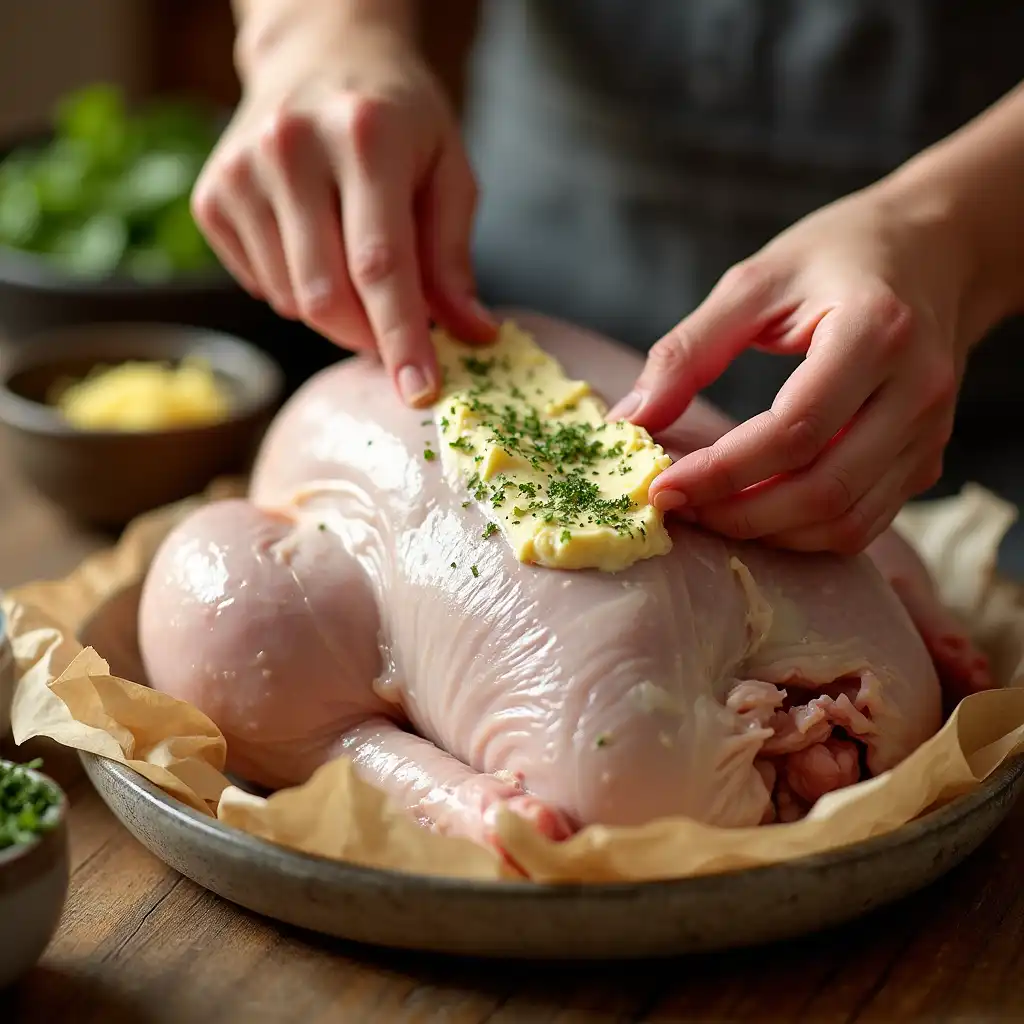
- Soften a stick of unsalted butter and mix it with minced garlic, chopped parsley, and a pinch of salt.
- Gently loosen the skin of the turkey breast using your fingers, creating a pocket.
- Spread the butter mixture under the skin, covering the meat thoroughly.
- Apply the remaining butter over the skin to encourage even browning.
Part 3: Cooking Methods
Roasting Turkey Breast
Roasting is a classic method that delivers a golden, crisp exterior while keeping the meat moist when done correctly. The key to a perfectly roasted turkey breast is controlling the temperature and using a reliable meat thermometer.
Step-by-Step Roasting Instructions:
- Preheat the Oven: Set your oven to 350°F (175°C). Preheating ensures even cooking.
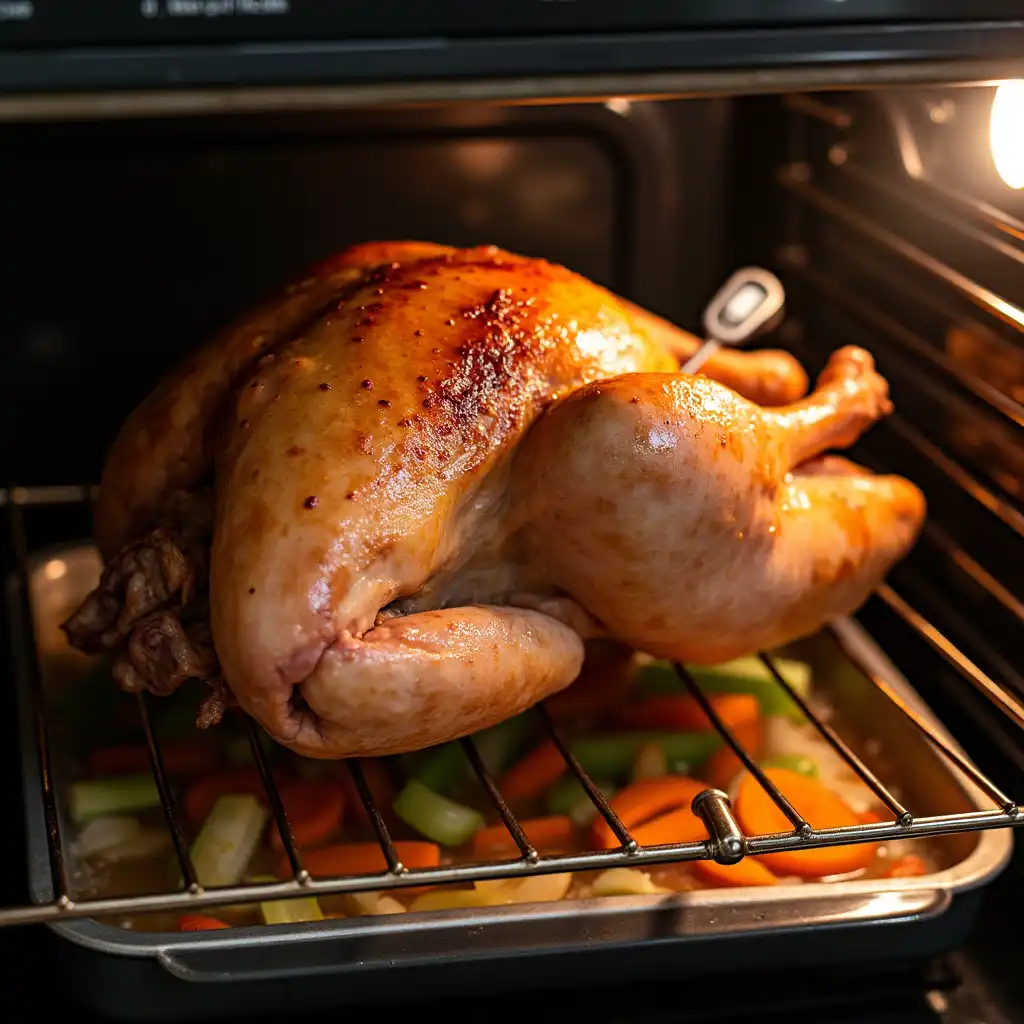
- Prepare the Turkey: Place the seasoned turkey breast (skin-on if possible) on a roasting rack inside a baking dish. Elevating it allows heat to circulate.
- Add Aromatics: For enhanced flavor, add onions, garlic, carrots, and celery to the roasting pan. A splash of chicken broth can help create steam, preventing dryness.
- Roast: Cook the turkey breast for approximately 20 minutes per pound. For example, a 4-pound breast would take about 1 hour and 20 minutes.
- Check the Temperature: Insert a meat thermometer into the thickest part of the meat, avoiding the bone. Remove the turkey when it reaches 160°F (71°C); it will rise to the ideal 165°F (74°C) during resting.
- Rest the Meat: Cover the turkey loosely with foil and let it rest for 15-20 minutes before carving. This step redistributes juices, ensuring moist slices.
Slow Cooking Turkey Breast
Slow cooking is a fantastic way to lock in moisture and flavor with minimal effort. This method is perfect for busy cooks who want tender, fall-apart turkey breast without constant monitoring.
How to Slow Cook Turkey Breast:
- Set Up the Slow Cooker: Place a layer of sliced onions and garlic at the bottom for flavor.
- Season and Add Liquid: Season the turkey breast with your favorite rub and add a cup of chicken stock or water.
- Cook Low and Slow: Set the slow cooker to low heat and cook for 6-8 hours, depending on the size of the turkey breast. High heat can also work but may risk drying it out.
- Crisp the Skin (Optional): After cooking, you can broil the turkey breast in the oven for a few minutes to achieve a crisp exterior.
Grilling Turkey Breast
Grilling brings a smoky flavor to the turkey breast, making it ideal for those who enjoy outdoor cooking. However, grilling requires close attention to avoid overcooking.
Grilling Tips for Juicy Turkey Breast:
- Prepare the Grill: Set up your grill for indirect cooking by keeping one side on medium heat and the other unlit.
- Season Generously: Rub the turkey breast with oil and season with salt, pepper, and your choice of spices.
- Grill Indirectly: Place the turkey breast on the unlit side, skin-side up, and close the lid. Maintain a temperature of 325°F-350°F (160°C-175°C).
- Monitor with a Thermometer: Turn the turkey occasionally and check the internal temperature. Remove it from the grill at 160°F (71°C) and rest it for 10-15 minutes before serving.
Sous Vide Turkey Breast
Sous vide is the ultimate cooking method for ensuring a moist turkey breast. By cooking the meat at a precise, low temperature in a vacuum-sealed bag, sous vide guarantees consistent results.
Sous Vide Instructions:
- Prepare the Turkey: Season the turkey breast and place it in a vacuum-sealed bag with a pat of butter or olive oil.
- Set the Temperature: Heat your sous vide water bath to 145°F (63°C). This ensures tender, fully cooked meat.
- Cook Slowly: Submerge the sealed bag and cook for 2-3 hours.
- Finish for Texture: After sous vide, quickly sear the turkey breast in a hot skillet to crisp the exterior.
Part 4: Additional Tips and Serving
Basting: Is It Necessary?
Ah, basting—the age-old debate for turkey enthusiasts! Many people swear by it, claiming it keeps the turkey moist. However, in practice, basting is more about flavoring the exterior than adding internal moisture. While basting can help the skin achieve a beautiful golden-brown color, opening the oven frequently releases heat, which could potentially prolong cooking time and risk dryness.
Alternatives to Traditional Basting:
- Butter Rub Under the Skin: Applying a seasoned butter rub beneath the skin before cooking creates self-basting as the butter melts.
- Foil Tent: Covering the turkey breast with aluminum foil for the first half of cooking prevents excessive drying from direct heat.
- Adding Moisture to the Pan: Place a pan of water or chicken broth in the oven during roasting. This generates steam, keeping the breast tender.
Letting the Turkey Rest
Letting the turkey breast rest after cooking is one of the most critical steps for preserving moisture. During cooking, the juices in the meat are pushed toward the surface. Resting allows those juices to redistribute evenly, resulting in succulent, flavorful slices.
How Long to Rest a Turkey Breast:
-
Rest the turkey breast for 10-20 minutes after removing it from the heat. Cover it loosely with foil to maintain warmth without trapping steam, which could soften the crispy skin.
Carving the Turkey Breast
Carving a turkey breast correctly is just as important as cooking it right. Improper carving can lead to uneven slices and wasted juices. A sharp knife and steady hand make all the difference.
Steps for Perfect Carving:
- Position the Turkey: Place the breast on a sturdy cutting board, skin-side up.
- Slice Along the Breastbone: Find the center breastbone and carve down one side, separating the meat from the bone.
- Cut Against the Grain: Slice the meat into even pieces across the grain. This ensures tender bites.
- Serve Immediately: Arrange slices on a platter for a visually appealing presentation.
Serving Suggestions
Pairing turkey breast with complementary dishes elevates the meal to another level. From savory sides to flavorful sauces, a well-thought-out combination can balance the dish beautifully.
Recommended Side Dishes:
- Mashed potatoes with garlic butter
- Roasted seasonal vegetables (think carrots, Brussels sprouts, or squash)
- Cranberry sauce or citrus-based chutneys for a sweet and tangy contrast
Sauces and Gravies:
A creamy turkey gravy or a tangy herb sauce like chimichurri adds moisture and layers of flavor to your dish.
Part 5: Storing and Reheating Leftovers
Properly Storing Turkey Breast Leftovers
Leftover turkey breast can be a delight for sandwiches, soups, or even creative dishes like turkey pot pie. However, storing it the right way is key to preserving its moisture and flavor. Improper storage can lead to dried-out meat, even after your best cooking efforts.
Steps for Storing Turkey Breast:
- Cool Down Quickly: Allow the turkey to cool to room temperature but don’t leave it out for more than two hours to avoid bacterial growth.
- Slice Before Storing: Slice the turkey breast into portions for easier reheating. Smaller slices also allow for more even cooling.
- Use Airtight Containers: Store the turkey in an airtight container or resealable bag. For extra moisture retention, add a splash of broth or gravy.
- Refrigerate or Freeze: Refrigerate the leftovers if you plan to eat them within 3-4 days. For longer storage, freeze the turkey for up to 2-3 months.
Reheating Turkey Breast Without Drying It Out
Reheating turkey breast can be tricky since the process often dries it out. The secret is to heat it gently and add moisture whenever possible.
Reheating Methods:
- In the Oven: Place turkey slices in a baking dish, drizzle with broth or gravy, and cover with foil. Heat at 325°F (165°C) for about 15-20 minutes.
- In the Microwave: Arrange turkey slices in a single layer on a microwave-safe plate. Cover with a damp paper towel and heat on medium power in 30-second intervals.
- On the Stovetop: Add a splash of broth or water to a skillet, place turkey slices inside, and heat over low heat, covered, for a few minutes.
How to Prevent Dryness During Reheating
- Add Fat: A small pat of butter or a drizzle of olive oil over the turkey can work wonders for flavor and moisture.
- Avoid Overheating: Warm the meat just until heated through—overheating will squeeze out the juices.
Creative Uses for Leftover Turkey Breast
If reheating plain turkey feels uninspiring, transform the leftovers into something fresh and exciting! Here are a few ideas:
- Turkey Salad: Combine shredded turkey with mayonnaise, celery, and cranberries for a tasty sandwich filling.
- Turkey Soup: Add leftover turkey to a hearty vegetable soup or creamy chowder.
- Turkey Tacos: Season turkey slices with taco seasoning, then serve in tortillas with salsa and avocado.
Part 6: Frequently Asked Questions
How do you keep a turkey breast moist when roasting?
Keeping a turkey breast moist while roasting starts with the right preparation. Brining or marinating adds essential moisture and flavor before cooking. Once in the oven, roasting at a moderate temperature (around 350°F or 175°C) ensures even cooking. Using a roasting rack keeps the turkey elevated, allowing heat to circulate and avoiding soggy spots. For extra moisture, tent the turkey with foil for the first half of cooking, removing it later to crisp the skin.
Should you cook turkey breast covered or uncovered?
Both approaches have their benefits, but the ideal method combines them. Cooking covered with foil or a lid at the start helps trap steam, keeping the meat juicy. Toward the end of cooking, uncover the turkey to allow the skin to brown and crisp. This way, you get the best of both worlds: tender meat and a flavorful crust.
What is the best temperature to cook a turkey breast?
The ideal oven temperature for cooking turkey breast is 350°F (175°C). This temperature ensures the meat cooks evenly without drying out. Always use a meat thermometer to check for doneness. The turkey breast is ready to come out of the oven when the internal temperature reaches 160°F (71°C), as it will rise to 165°F (74°C) while resting.
How long should you let a turkey breast rest after cooking?
Resting the turkey breast for at least 10-20 minutes after cooking is crucial. This allows the juices to redistribute throughout the meat, ensuring every slice is tender and flavorful. Cover the turkey loosely with foil during the resting period to keep it warm.
Can you brine a turkey breast too long?
Yes, over-brining can lead to overly salty and mushy meat. For wet brining, limit the time to 6-12 hours, depending on the size of the turkey breast. Dry brining is slightly more forgiving but should not exceed 24 hours.
How can you add flavor to a turkey breast without drying it out?
Adding flavor while maintaining moisture starts with using herbs and seasonings. You can apply a butter or oil rub infused with garlic, parsley, thyme, or paprika under the skin. Cooking with aromatics like onions, carrots, and celery in the roasting pan also enhances the turkey’s flavor. For a finishing touch, serve the turkey with a complementary sauce or gravy.
Part 7: Conclusion and Suggested Links
Cooking a turkey breast that stays juicy and flavorful doesn’t have to be a daunting task. With the right preparation techniques, such as brining, marinating, and using butter or oil rubs, along with mastering cooking methods like roasting, slow cooking, grilling, or sous vide, you can confidently serve a moist turkey breast every time. Remember to rest the meat, carve it properly, and pair it with flavorful sides and sauces for a complete dining experience. For leftovers, proper storage and gentle reheating methods will ensure the second helping is just as enjoyable.
Taking time to understand why turkey breast dries out and applying these expert techniques will elevate your cooking game, whether it’s for a holiday feast or a simple weeknight dinner.
Suggested Links for Additional Insights
- Sous Vide Turkey Breast Techniques
- Anchor Text: “Perfecting Sous Vide Turkey Breast”
- Seriouseats: Sous Vide Turkey Breast
- Safe Meat Cooking Temperatures
- Anchor Text: “Ensuring Safe Meat Cooking Temperatures”
- FoodSafety.gov: Safe Cooking Temperatures
These resources provide deeper insights into the methods discussed, complementing the information in this guide. If you have additional questions or need assistance with specific steps, feel free to ask!


